Final Design
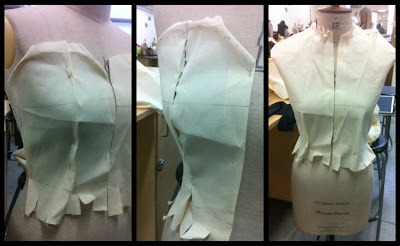
This is my final garment, The techniques I used are deconstruction, draping and pleating. These are the sessions in the past weeks that I enjoyed and feel most strongest area. My inspirations from making this piece are the workshop sessions such as playing around with different silhouettes, a Japanese fashion designer Issey Miyake. His works are very innovative and interesting.
Gareth Push style of designs is also very inspiring, The way his garments are very structured and strong are very creative.
Also my final piece remind me of the the street trend fashion in Japan called Lolita girls, There style has a lot lace and fluffy skirts and has a lot of layers.
16:15 | | 0 Comments
The making and fastenings
To make the final garment I started with a base that I did last session and from here I adjust it that is required to my designs.
I added the darts from top and bottom to fit around the bust and made it more fitted. This will then hold any techniques I will be using such as draping and de-constructing around the pattern.
Then I started to draped the half of the bodice with the tailored jacket. I have stitched it around the form its shape like a quilting technique. Then I draped the other side of the bodice with the black silk.
The image above is the making of the top of my final garment. For the draping on the other side of the bodice. I used a straight stitch while scrunching the fabric forward. It has a really dramatic effect. The excess fabric will then be cut off and it is intended that this top will show the side of the waist.
The back is all also a de-constructed tailored jacket with minimal quilting technique. As for the fastening back of the top is eyelets and a black cord.
As for the skirt I used a vogue pattern as the base of of the skirt, this will then be pleated and added the same flower fabric accessory from the top along the bottom.
This skirt flares at the bottom, so I had to make four and attach them all together. The fastening of this skirt will be a zipper at the back.
These are the two fastening I have chosen which was eyelets and zipper. I had difficulty applying the eyelets bus my fabric was very thick.
This is the lining and the front base of the skirt. I pleated the each section by 4cm and folder the skirt to make a structure.
The image below is the whole view of the dress, I can now attached the lining and the zipper. The trail will then be hand stitched in each end of the waist.
14:52 | | 0 Comments
Initial Designs
To be able to gather my thought and ideas towards my final design for my garment, I sketched Initial Ideas and developed them.
This image above is just few initial ideas for my final piece, While doing this sketches I had the techniques of De-construction, draping and pleating in mind. Then I developed this by doing four more design ideas from this six initial designs.
15:27 | | 0 Comments
Wearable Structure
In this workshop we were asked to start experimenting about our wearable structure. In this we can play around the different techniques and sessions we have done in the past few weeks.
The workshops we have done so far are
- Paper modelling on stand
- Paper manipulation
- Chair sculptures
- Garment sculpture on stand
- De-constructed tailored jacket
- Silhouette with chair
- Pleating
- Draping
05:08 | | 0 Comments
Draping
In this session, we played around draping on the stand. I looked back at the other techniques we did in the past couple of weeks and to try to incorporate it in this workshop.
Firstly, I was inspired by Alexadre McQueen's Royal Collection, It looks very minimal and interesting. The curve in this designs are very collective.
This image below is Givenchy Couture, This collection is very elegant and simple yet it is very appealing and has a lot of charisma.
And this collection from Lanvin states a strong and fierce woman. The drapes are bold and has has an interesting silhouette.
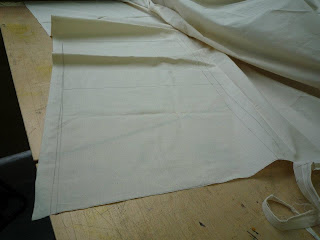
I started this draping workshop by making the base block pattern. To do this I needed to 40cm by 60cm into a calico fabric and draw a line in between which is 30cm.
16:44 | | 0 Comments
Pleating
In this session, we did a workshop about hand pleating. This are the few hand paper pleating that I found very interesting and innovative.
This image above is a Alphabet paper pleats, this 3d work makes each letter alive. It show a lot of depth and volume. This works are by Losiento called typeface.
Another paper folding which is more 2d. This works are by Tim Fishlock called Alphabet Relief.
Then I folded it horizontally to ease the folding.
I made another one of these pleats however with a bigger size. I think this will hold more on fabric and it will be easier to fold.
14:40 | | 0 Comments


