Garment Scupture on stand
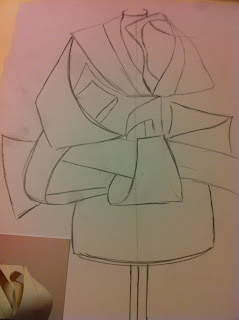
For this session, the chair sculpture we made have dried and made the materials stiff. So we took the piece out and put it on a stand to create a garment and sketch it.
The problem I came across is that the material does not have enough mutton cloth for the base so it became quite loose. However, this gave ideas to form other shapes and structure.
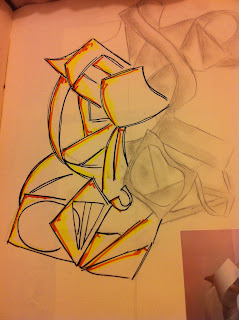
Just a few experimentation on few fashion illustration from the pieces on the stand using pencil and other materials such as paper and mutton cloths.
We draped and styled the fabric in different style, draping the piece gave it movement and depth.
We started sketching the piece on the stand, I experimented with the illustrations that I made. I decided to use movement and layering to emphasis the draping.
We experimented on different styles and mixed the two materials together.
As for the sketch, I experimented on using highlight to add shadows and life to the illustration. I also used the actual materials such as the mutton cloth and the tights for texture.
Now we have decided to think about the piece as a whole garment.
We did a few more drapings, I found this session very interesting because it helped me create unusual garment piece.
We put the garment on each other to see how it looks and drapes, because it still different when it is on the stand. Overall, this exercise has been benefial for creating garment pieces and generaing ideas. This has also helped me to think about my fashion illustrations.
16:34 | | 0 Comments
Chair Scuptures
In today's session, we are making a sculpture that then can be translated into a garment.
I had to prepare the materials beforehand we need which are:
- Mutton Cloth
- Nylon tights
- Fabrics Scissors
- PVA Glue
To make this sculpture, In my group we took two chairs and arranged them into a different way so that we can get a unusual shape and style.
The next step is to apply the clingfilm around the chair, This is to protect the chair from the PVA glue.
Whilst applying the cling film, it is also starting to form the shape and develop its structure.
We started with tights and just attached them randomly around the chair. So far, I really liked how we started it because It is mixed and looked very interesting.
After that we decided to add the mutton cloth, the problem that we faced is that we should have put the mutton cloth first a base so that the design will be on top.
I have distressed and made holes to the mutton cloth and tights to add texture it made the piece to have depth and volume.
We applied the PVA glue, we mixed it with water to dilute the glue because it is too thick.
Whilst this was drying I started to sketch design ideas and sketch how it will look like on the stand. For next weeks session, the glue would have been dried and this will make the materials to be stiff.
This reminded me of a designer which uses sculptures for her design and the media she uses are paper.
'DECOLLETAGE'
2011
'CHERISH'
2011
This images are from her official website http://www.susancutts.com/#about the work.
16:54 | | 0 Comments
PAPER MANIPULATION.
Paper manipulation.
The work I did today was continuing from last weeks session, Since I didn't like my first shapes I started again and developed it even further.
 |
I transferred it to a cartridge paper, I only scaled the shape by 20% because I wanted to try out if it will out before doing the final thing on A0 paper.
So I was happy with the draft that I made and I scaled this shape to 100% in the A0 paper and put it on the tailor dummy.
From the shapes that I have done, I moved onto making other shapes with same rule but putting them on different places.
From the flat shapes I draw on the paper, I have manipulated them by putting the end together to create curls and cutting the paper in the middle to create space for the neck.
I have decided to attach the first paper manipulation I made into this new one. So that together it would create a whole piece.
I made another shapes with same rules however this time I added like long rectangles so that I can curl them and put them into holes that I have cut out.
I paired with another student in the class, we combines our pieces together to make one garment. The shapes and structure we got are really interesting.
We took each turn to put the pieces together and we came up with different ideas and style.
To develop and improve this further, We scrunched the paper to create more texture and other different styles.
IDEA ONE - Having the paper scrunched up added depth and volume to the piece.
IDEA TWO - It became more flexible, The paper can now be manipulated easily.
IDEA THREE - We created the whole garment by also incorporating the back.
Overall, I found that I actually enjoy working in a larger scale and it sparked many creative ideas.
12:00 | | 0 Comments
Subscribe to:
Comments (Atom)
Powered by Blogger.


